The reason why Projector is slow
Projector rendering is slow…
This is because all the receiver polygons are repeatedly drawn for each projector, regardless of the projection size.
For example, in Basic sample, there are three shadow projectos and one Plane receiver.
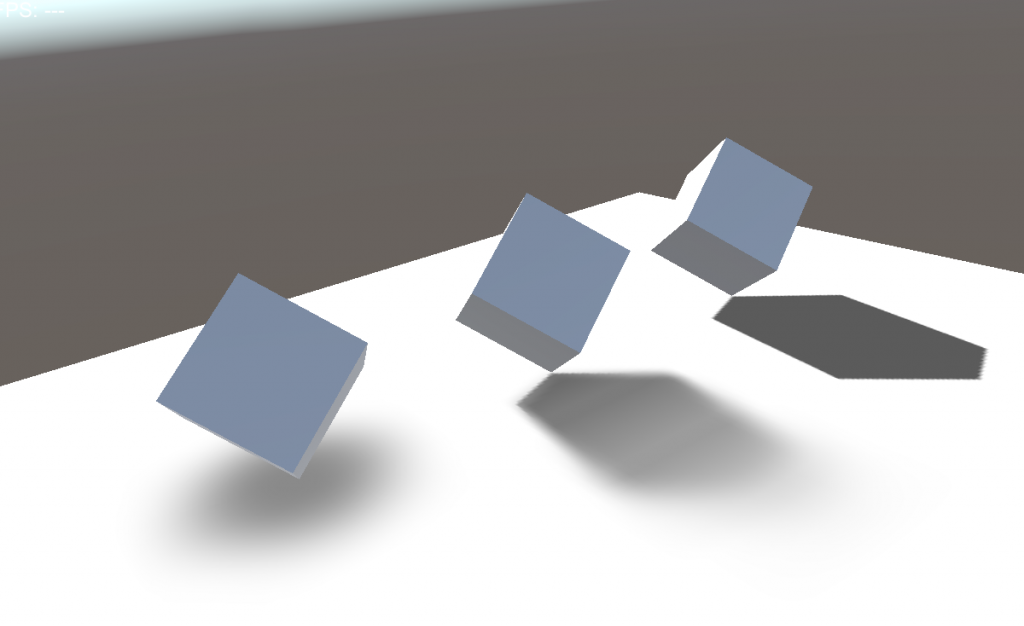
To render this scene, the entire surface of the plane object is drawn four times. One for the plane object, and three for the three projectors.
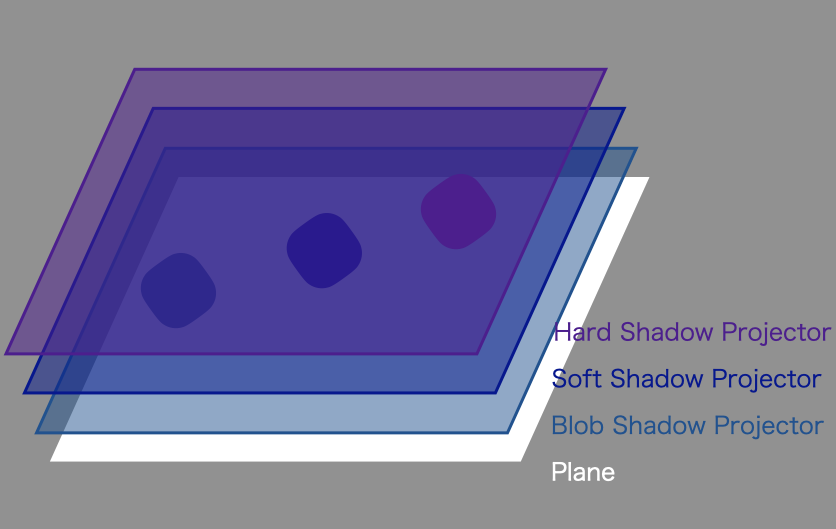
If we can draw only the minimum areas where the shadows are projected, the performance will be improved very much.

This is what our Fast Shadow Receiver does!
Performance Check
Before introducing Fast Shadow Receiver, let’s check if the projector rendering is really a cause of the performance issue.
If we can omit only the execution of projector’s fragment shader, we can estimate how slow the projector rendering is. We can do this by replacing projector shader.
In Assets/DynamicShadowProjector/Shaders/Projector folder, there is ‘Invisible’ material which draws no pixels on the screen. If you are using Projector For LWRP, you can set ‘Invisible’ material to ‘Replace Projector Material For Debug’ property of the Projector Renderer Feature in your Forward Renderer Data.
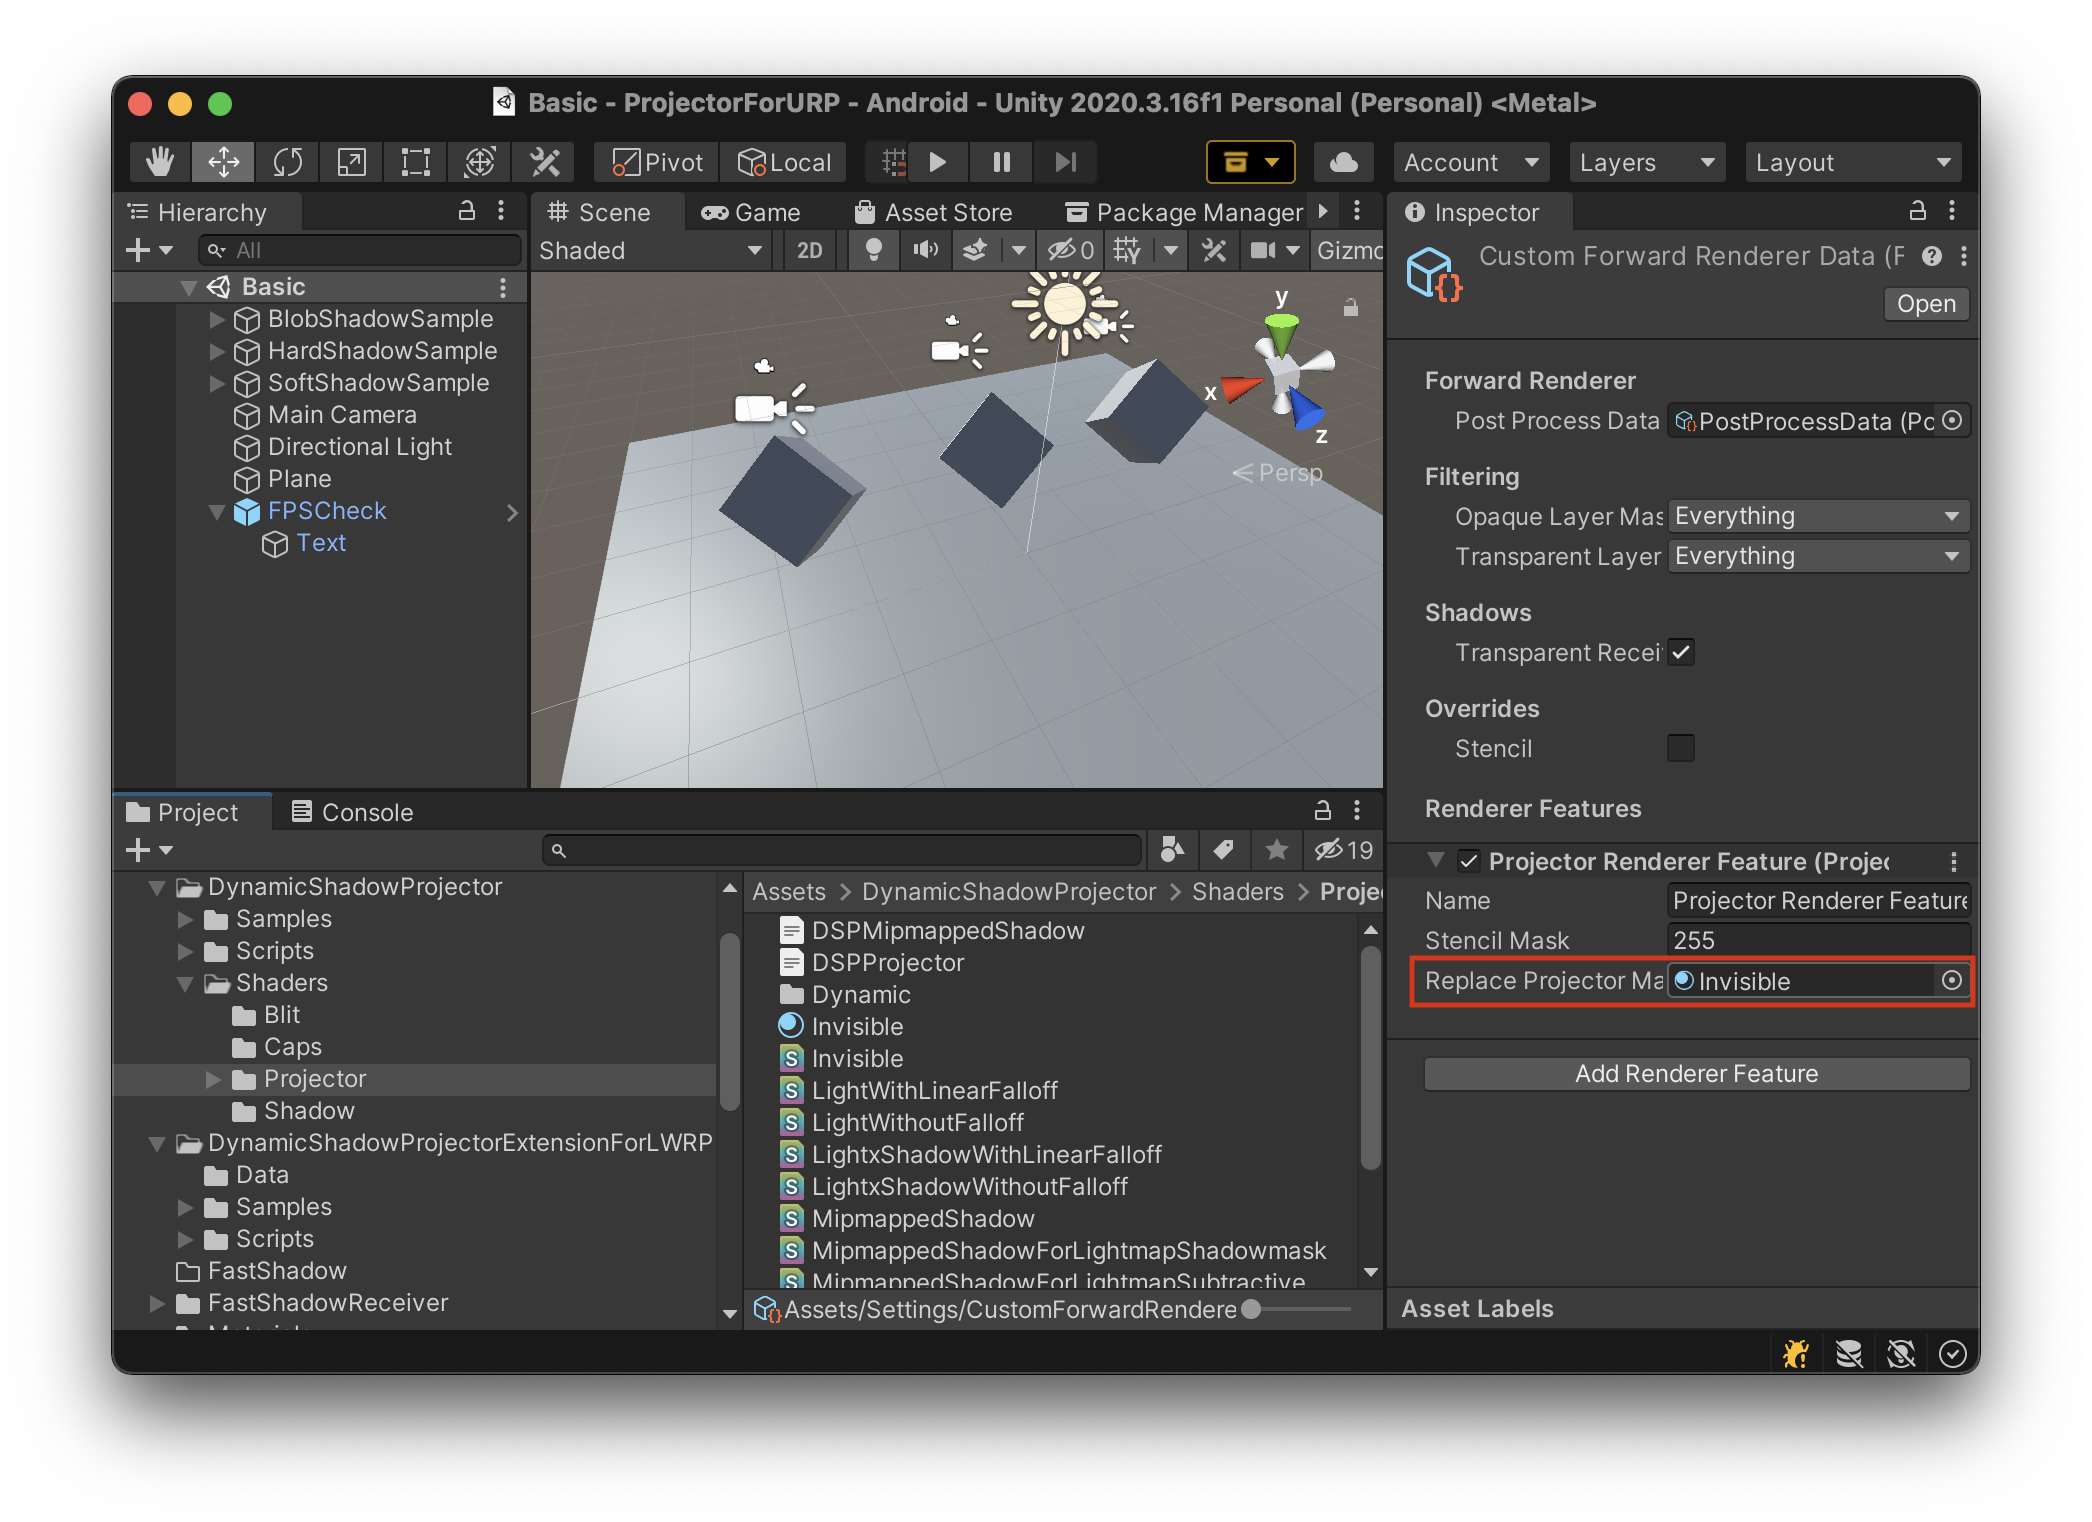
This property is available in debug mode. If you would like to test the performance on a device, please use Development Build.
If using builtin render pipeline, please replace projector materials one by one.
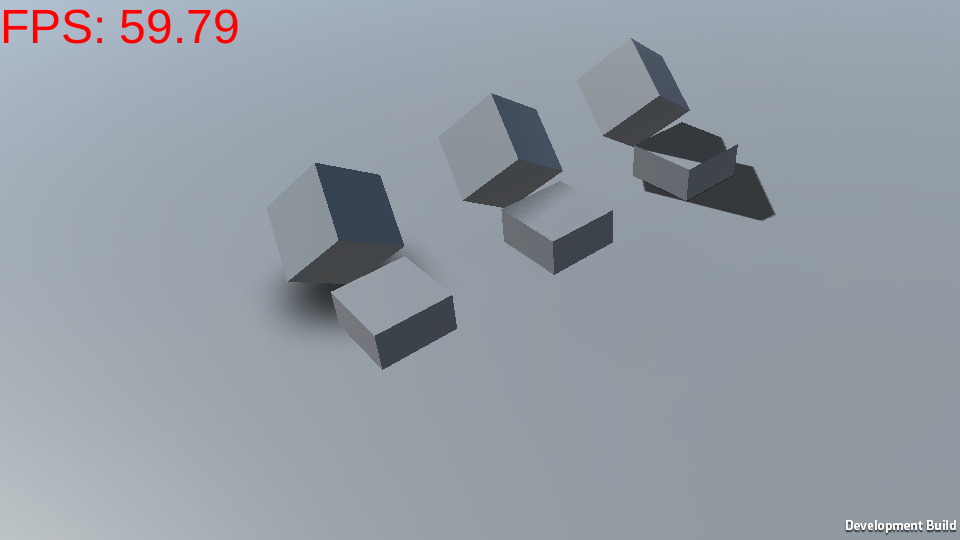
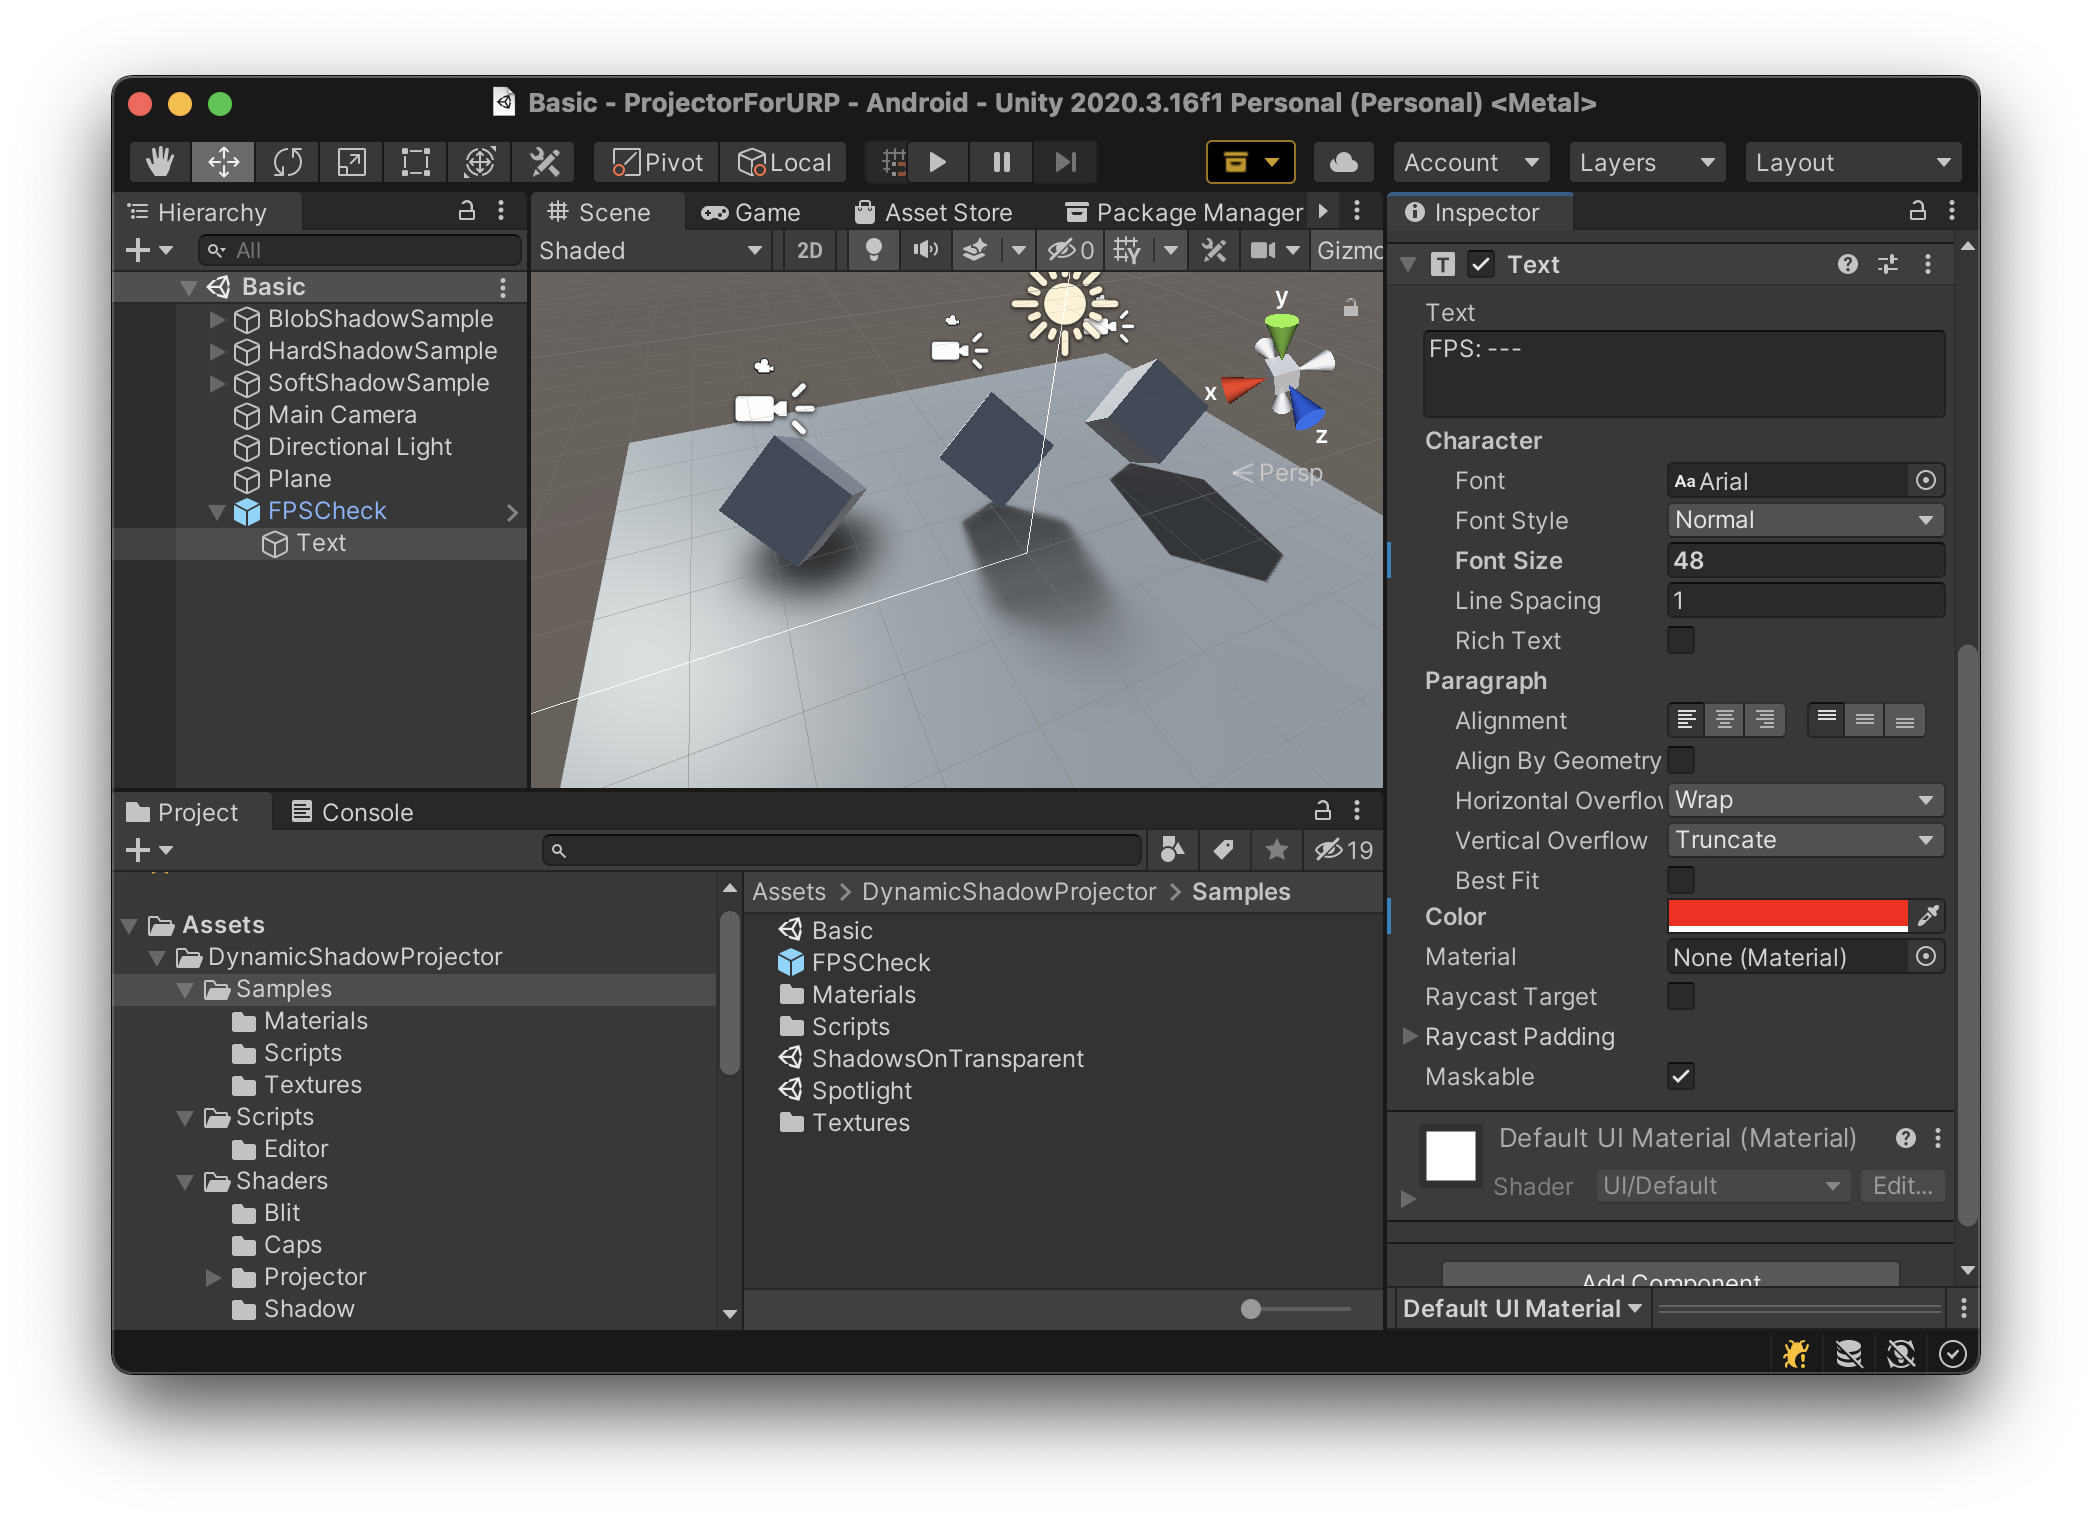
To see the performance, you can use FPSCheck prefab in Assets/DynamicShadowProjector/Samples folder. If needed, you can change the font size and color.
I tested the sample scene on an old android device which has Adreno 305 GPU with 540×960 display. To enhance the impact of the projector shader, I scaled up the plane object.
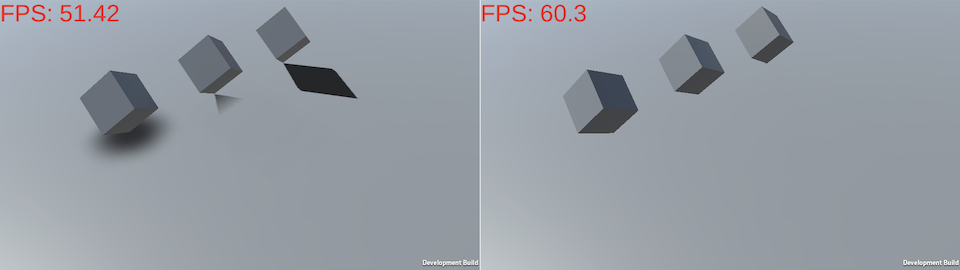
When projector rendering was enabled, Frames Per Second (FPS) was about 52. When disabled, FPS was about 60. That indicates Fast Shadow Receiver will most likely improve the performance.
Using Fast Shadow Receiver
If you don’t have Fast Shadow Receiver yet, please install it from Asset Store.
It is easy to apply Fast Shadow Receiver to the scene. Just follow the instructions in ‘Easy Setup Wizard for Projector Manager‘. I will demostrate it here for clarification.
Before that, I would like to add some mesh objects to show that Fast Shadow Receiver can be applied to more complex objects than a single plane.

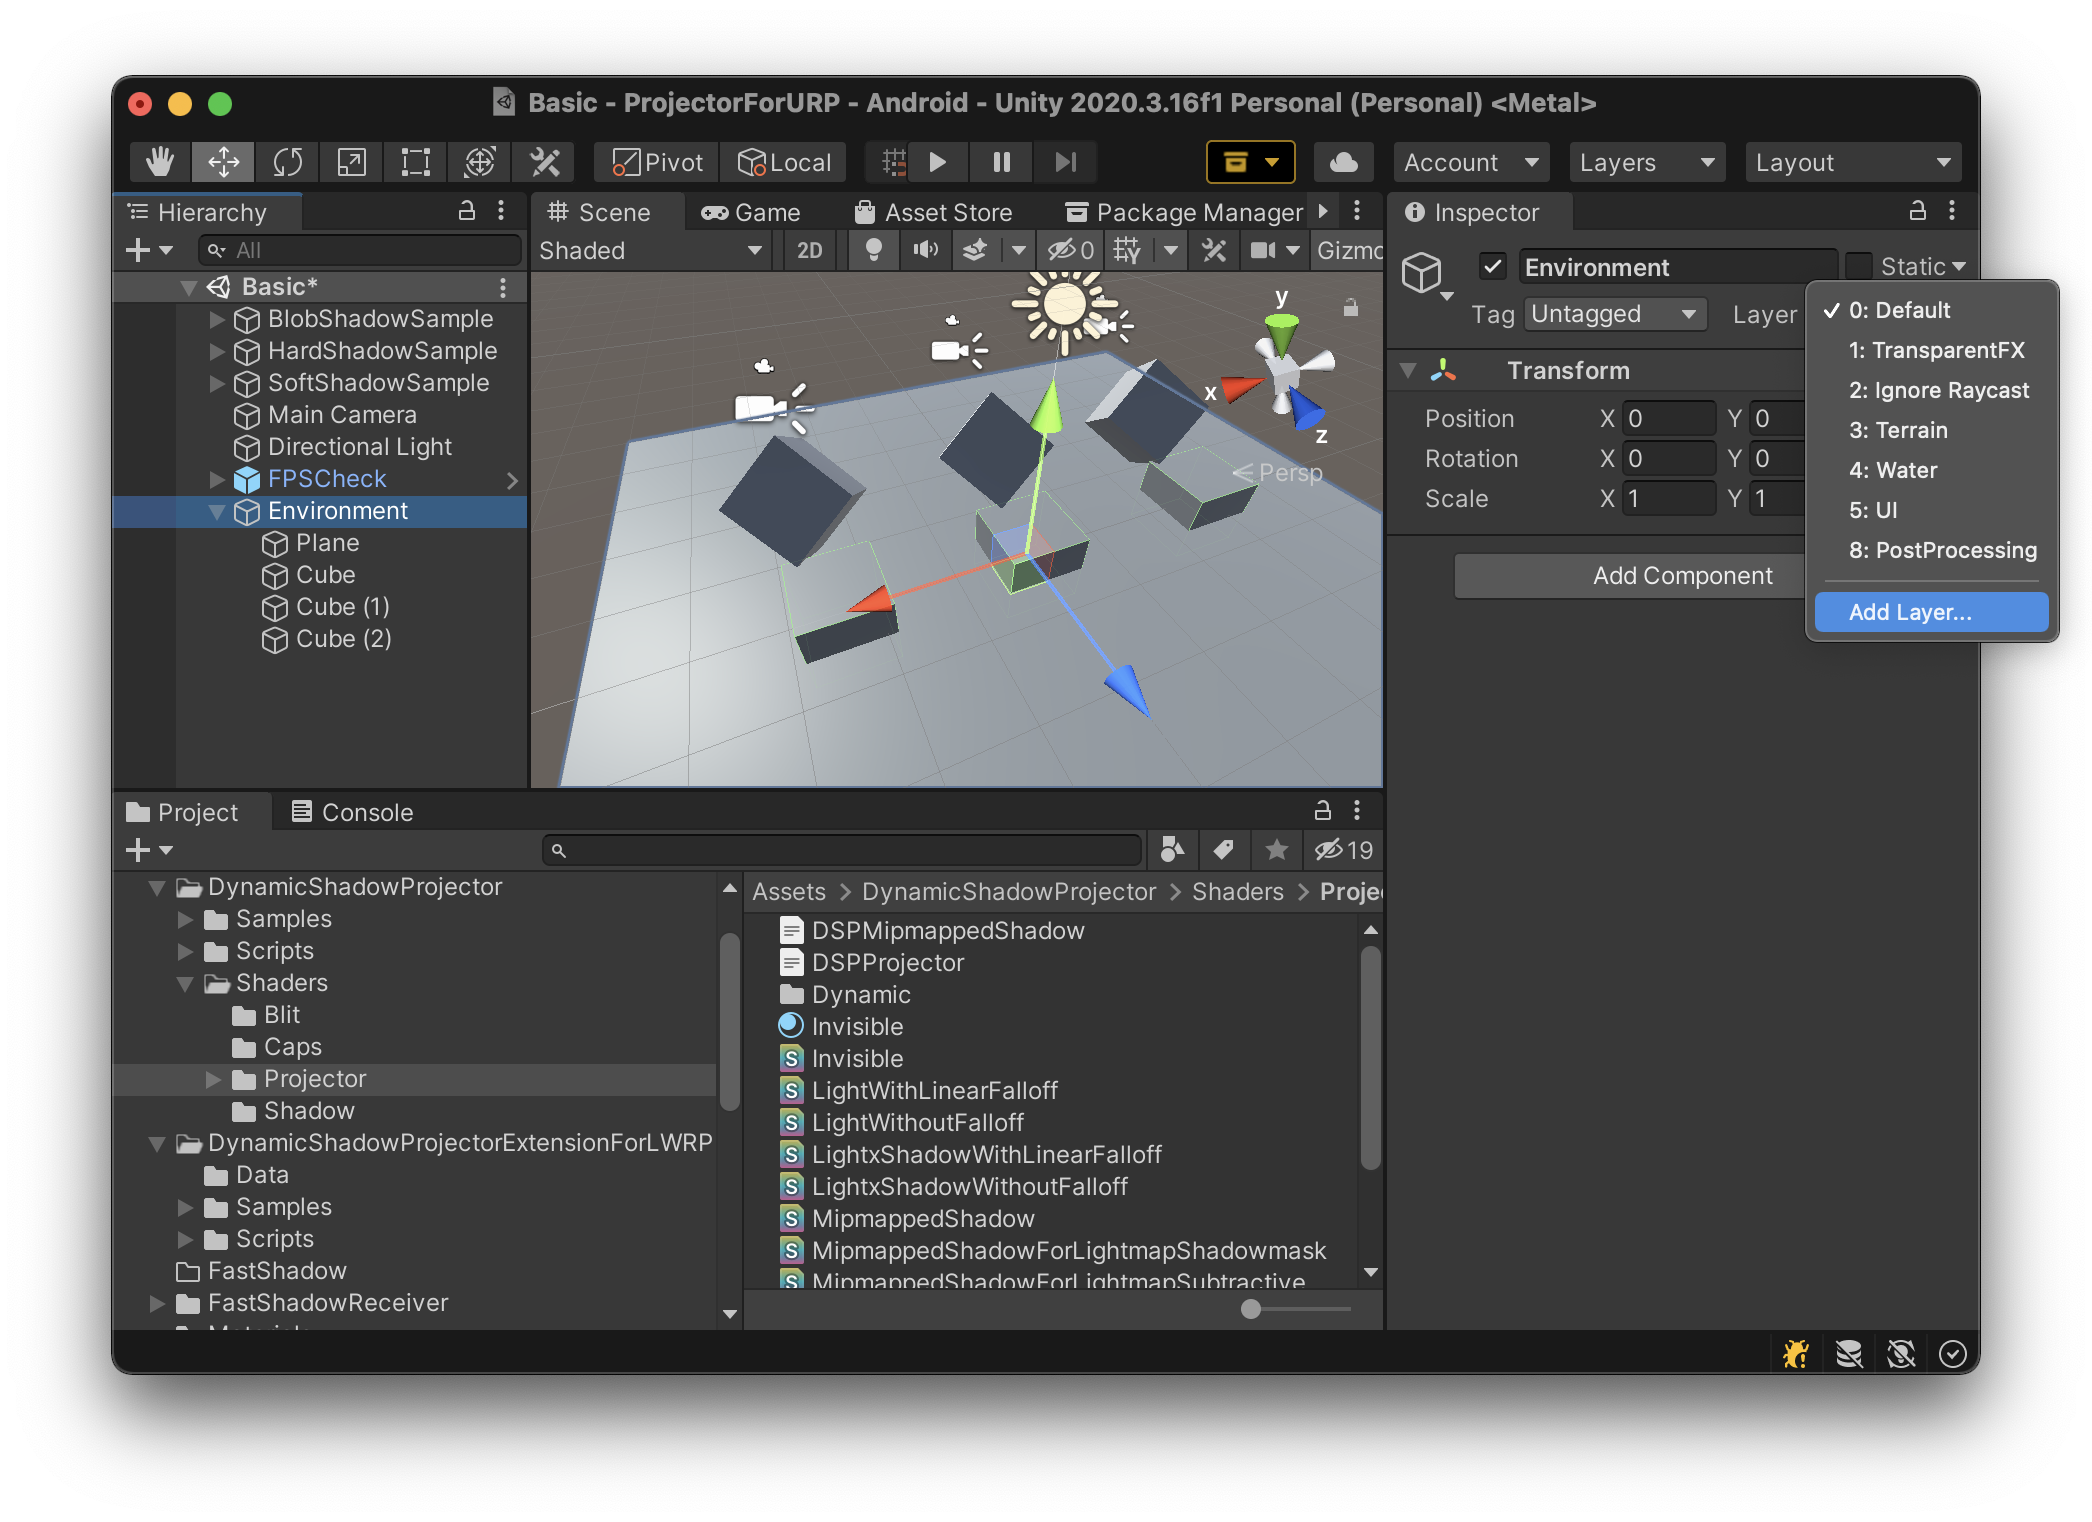
I created an empty game object named ‘Environment’ and put the plane object and some cube objects under the ‘Environment’ object. Those mesh objects are supposed to be Static, and typically, have lightmaps (Fast Shadow Receiver doesn’t require Static flag but relative positions from ‘Environment’ object shouldn’t be changed at runtime).
Let’s apply Fast Shadow Receiver to the ‘Environment’ objects.
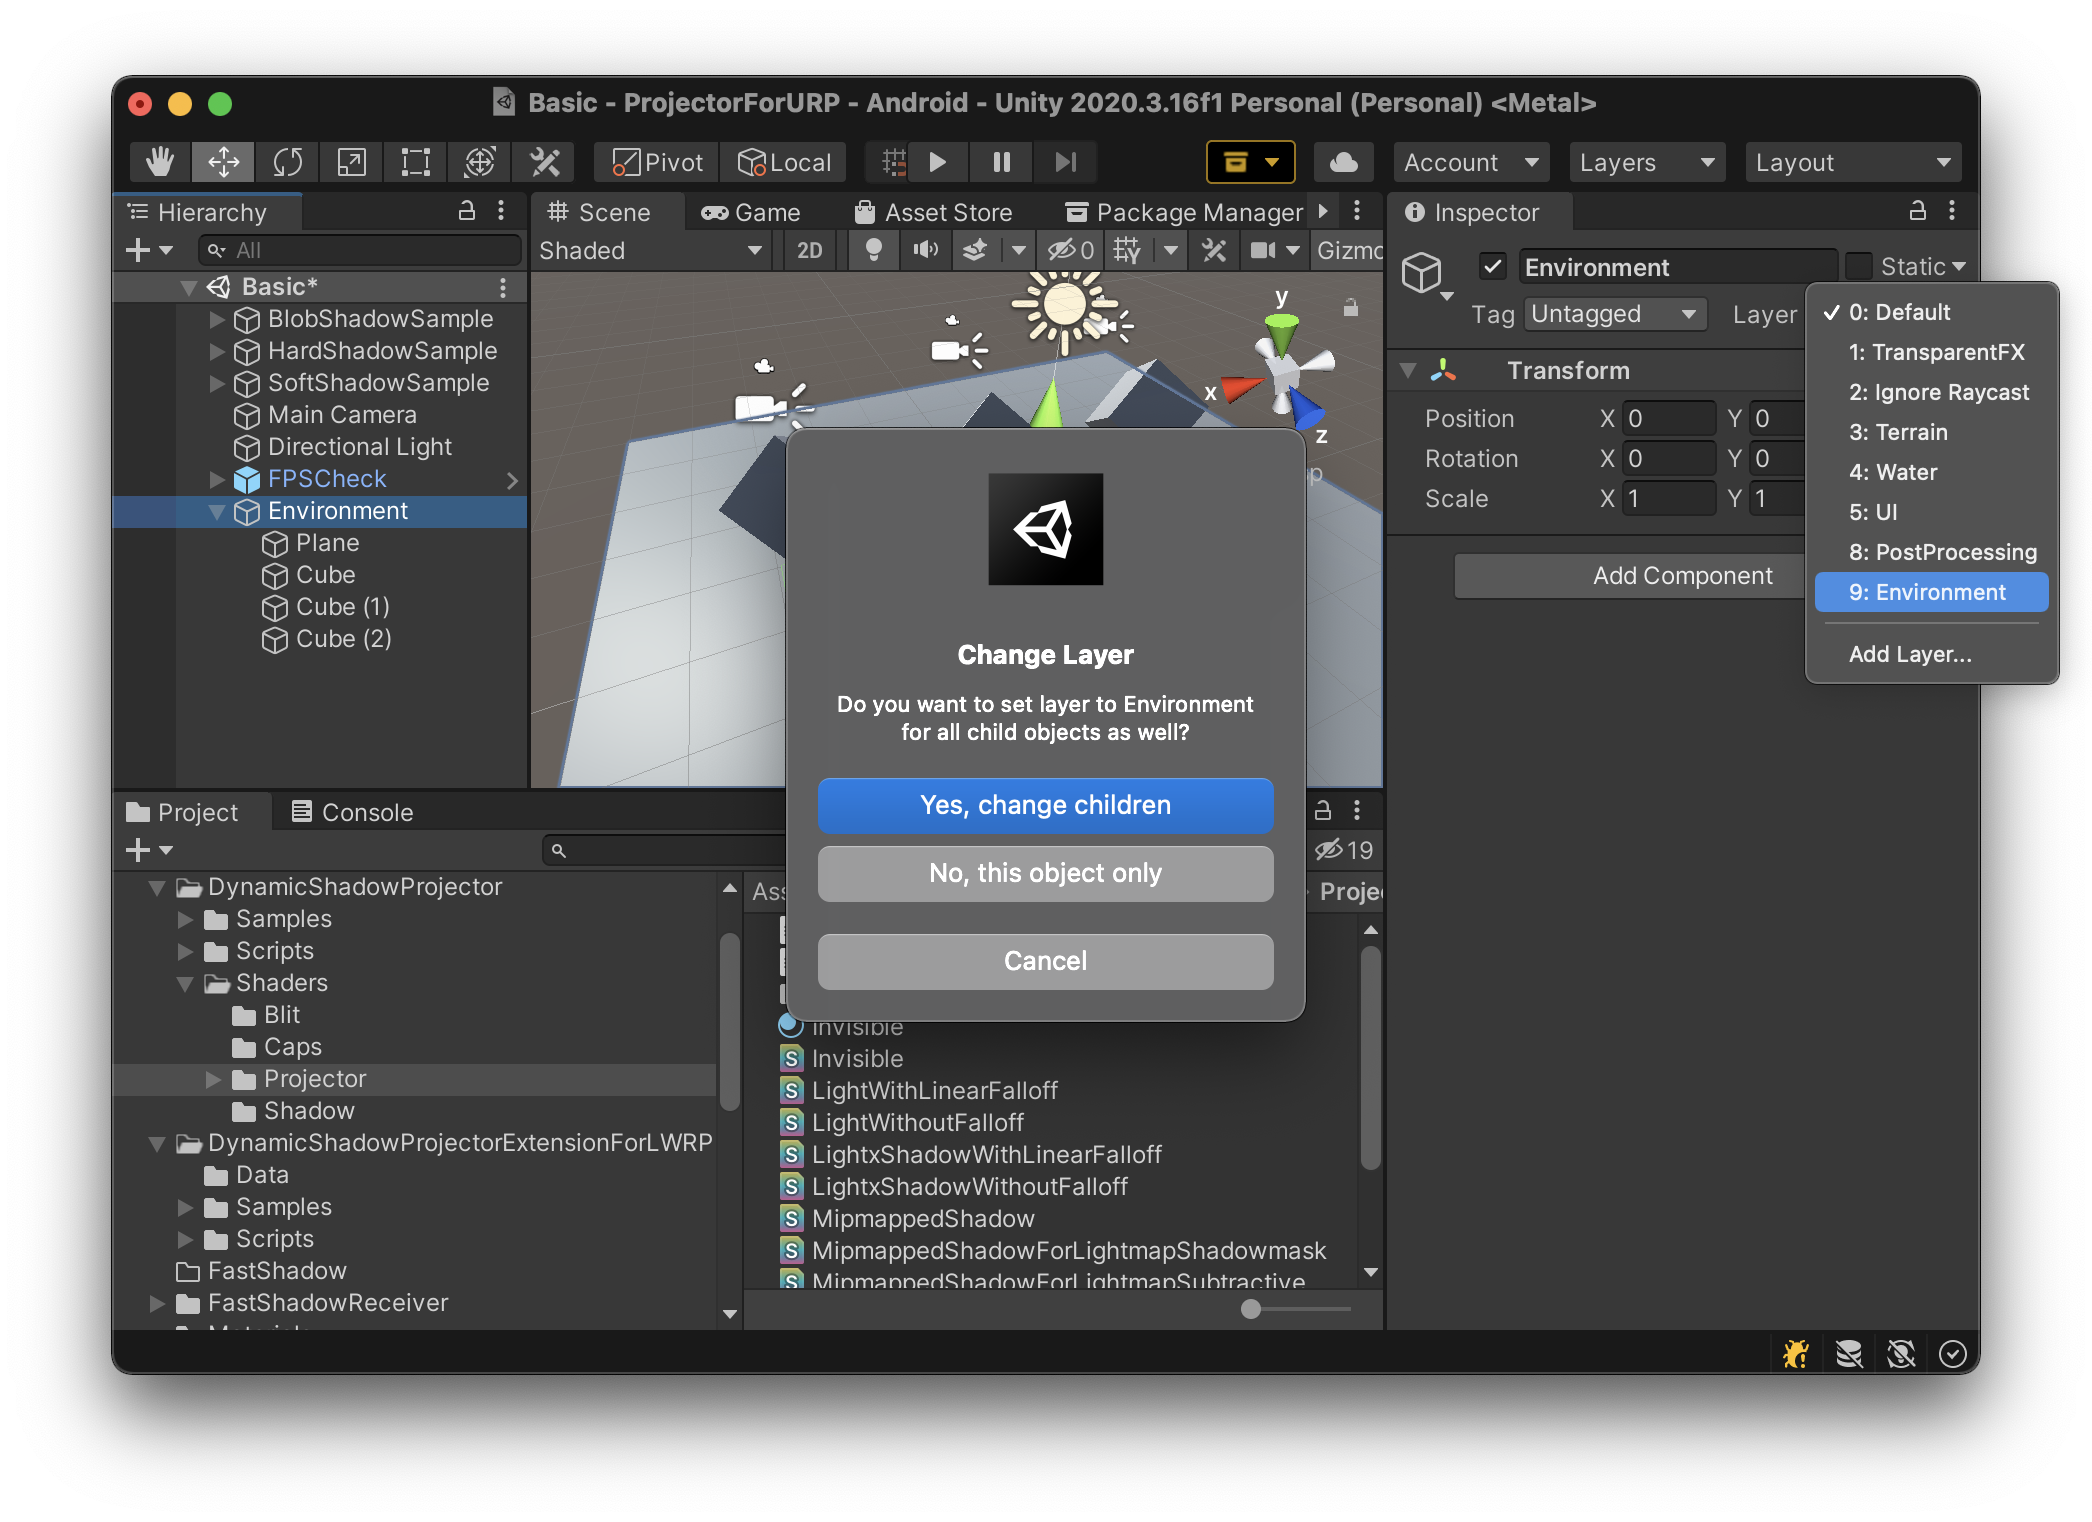
First of all, we need to add a layer to the scene.
Then, name it ‘Environment’.
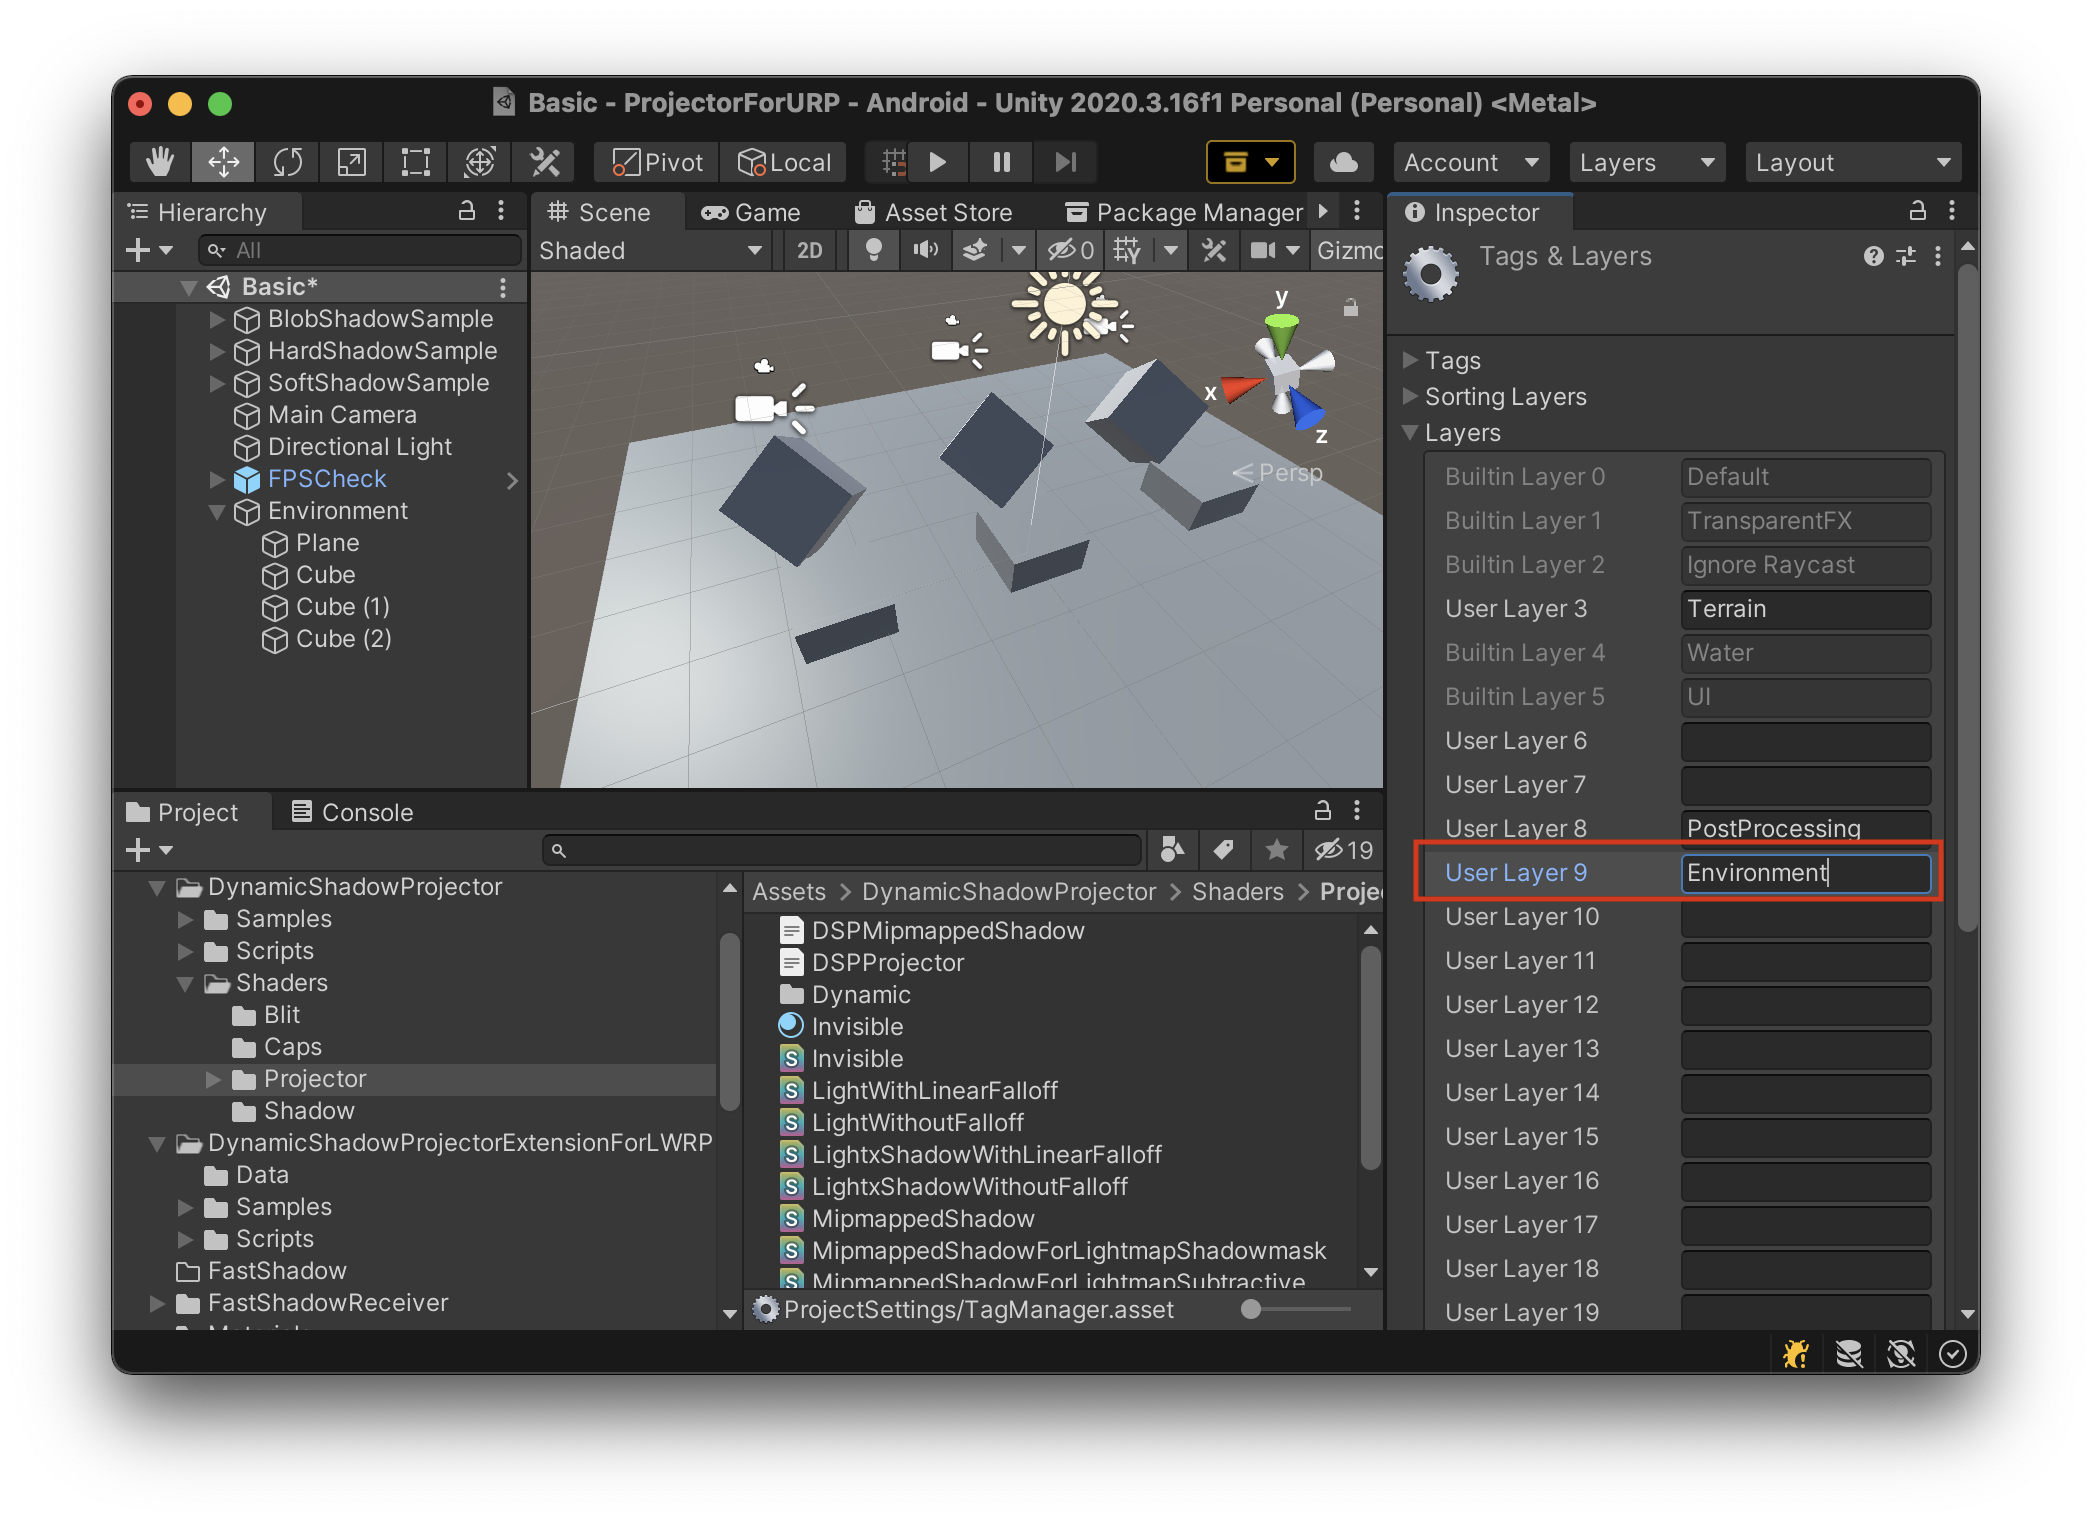
Change the layer of the ‘Environment’ object to ‘Environment’ including children.
Now I am going to make Fast Shadow Receiver object. Basic concept is, creating a receiver object for each projector. The receiver object will receive the shadow projected from the associated projector on behalf of the ‘Environment’ objects. However, creating a receiver object for each projector is a bit difficult, especially when projectors are instantiated from prefab objects. For such cases, I would like to use Projector Manager. Projector Manager will hold shadow receiver templates and duplicate them for each projector when the projector is enabled.
Create an empty object, name it ‘Projector Manager’, then add ‘Scripts > FastShadowReceiver > Projector Manager’ component.

Press ‘Easy Setup Wizard’ button in Inspector View.

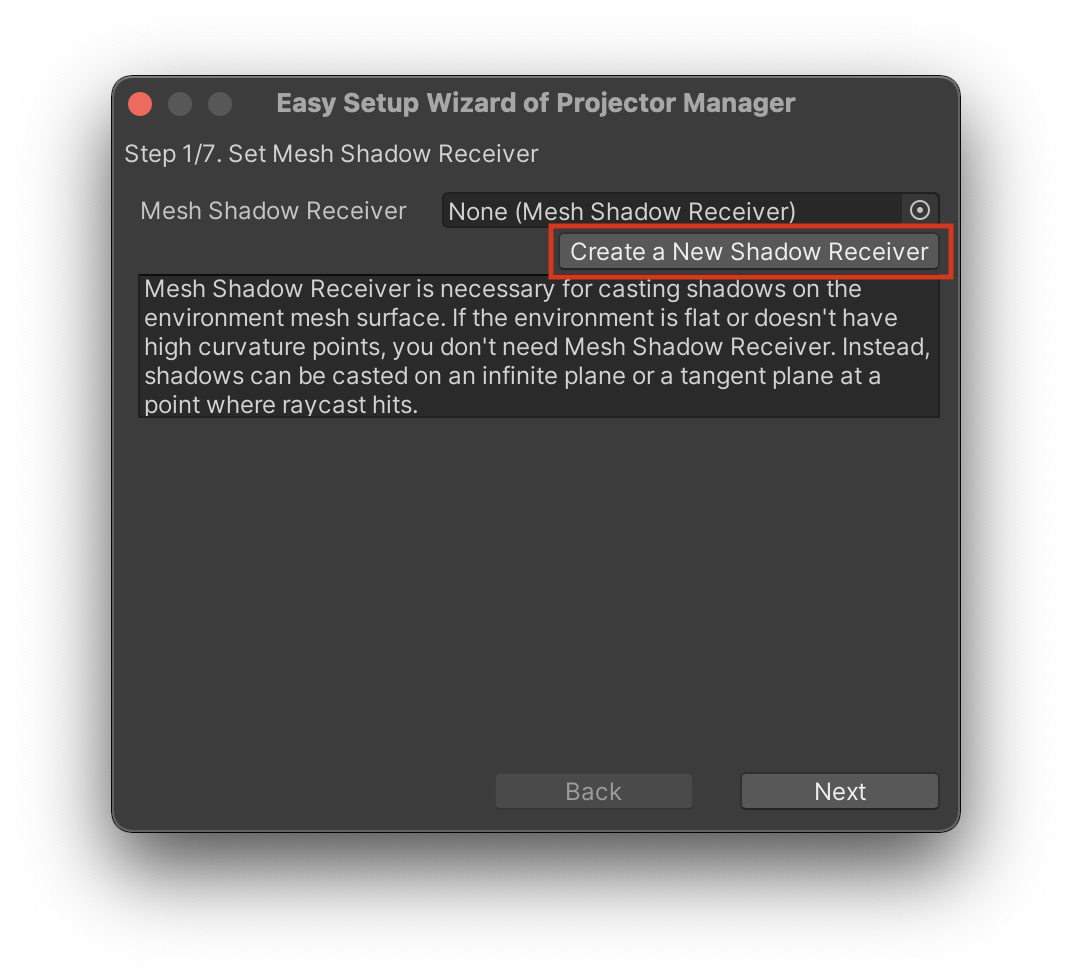
Create a New Shadow Receiver and go to Next page.
In the next page, select the ‘Environment’ object as ‘Root Object’ and ‘Environment’ layer as ‘Environment Layers’.
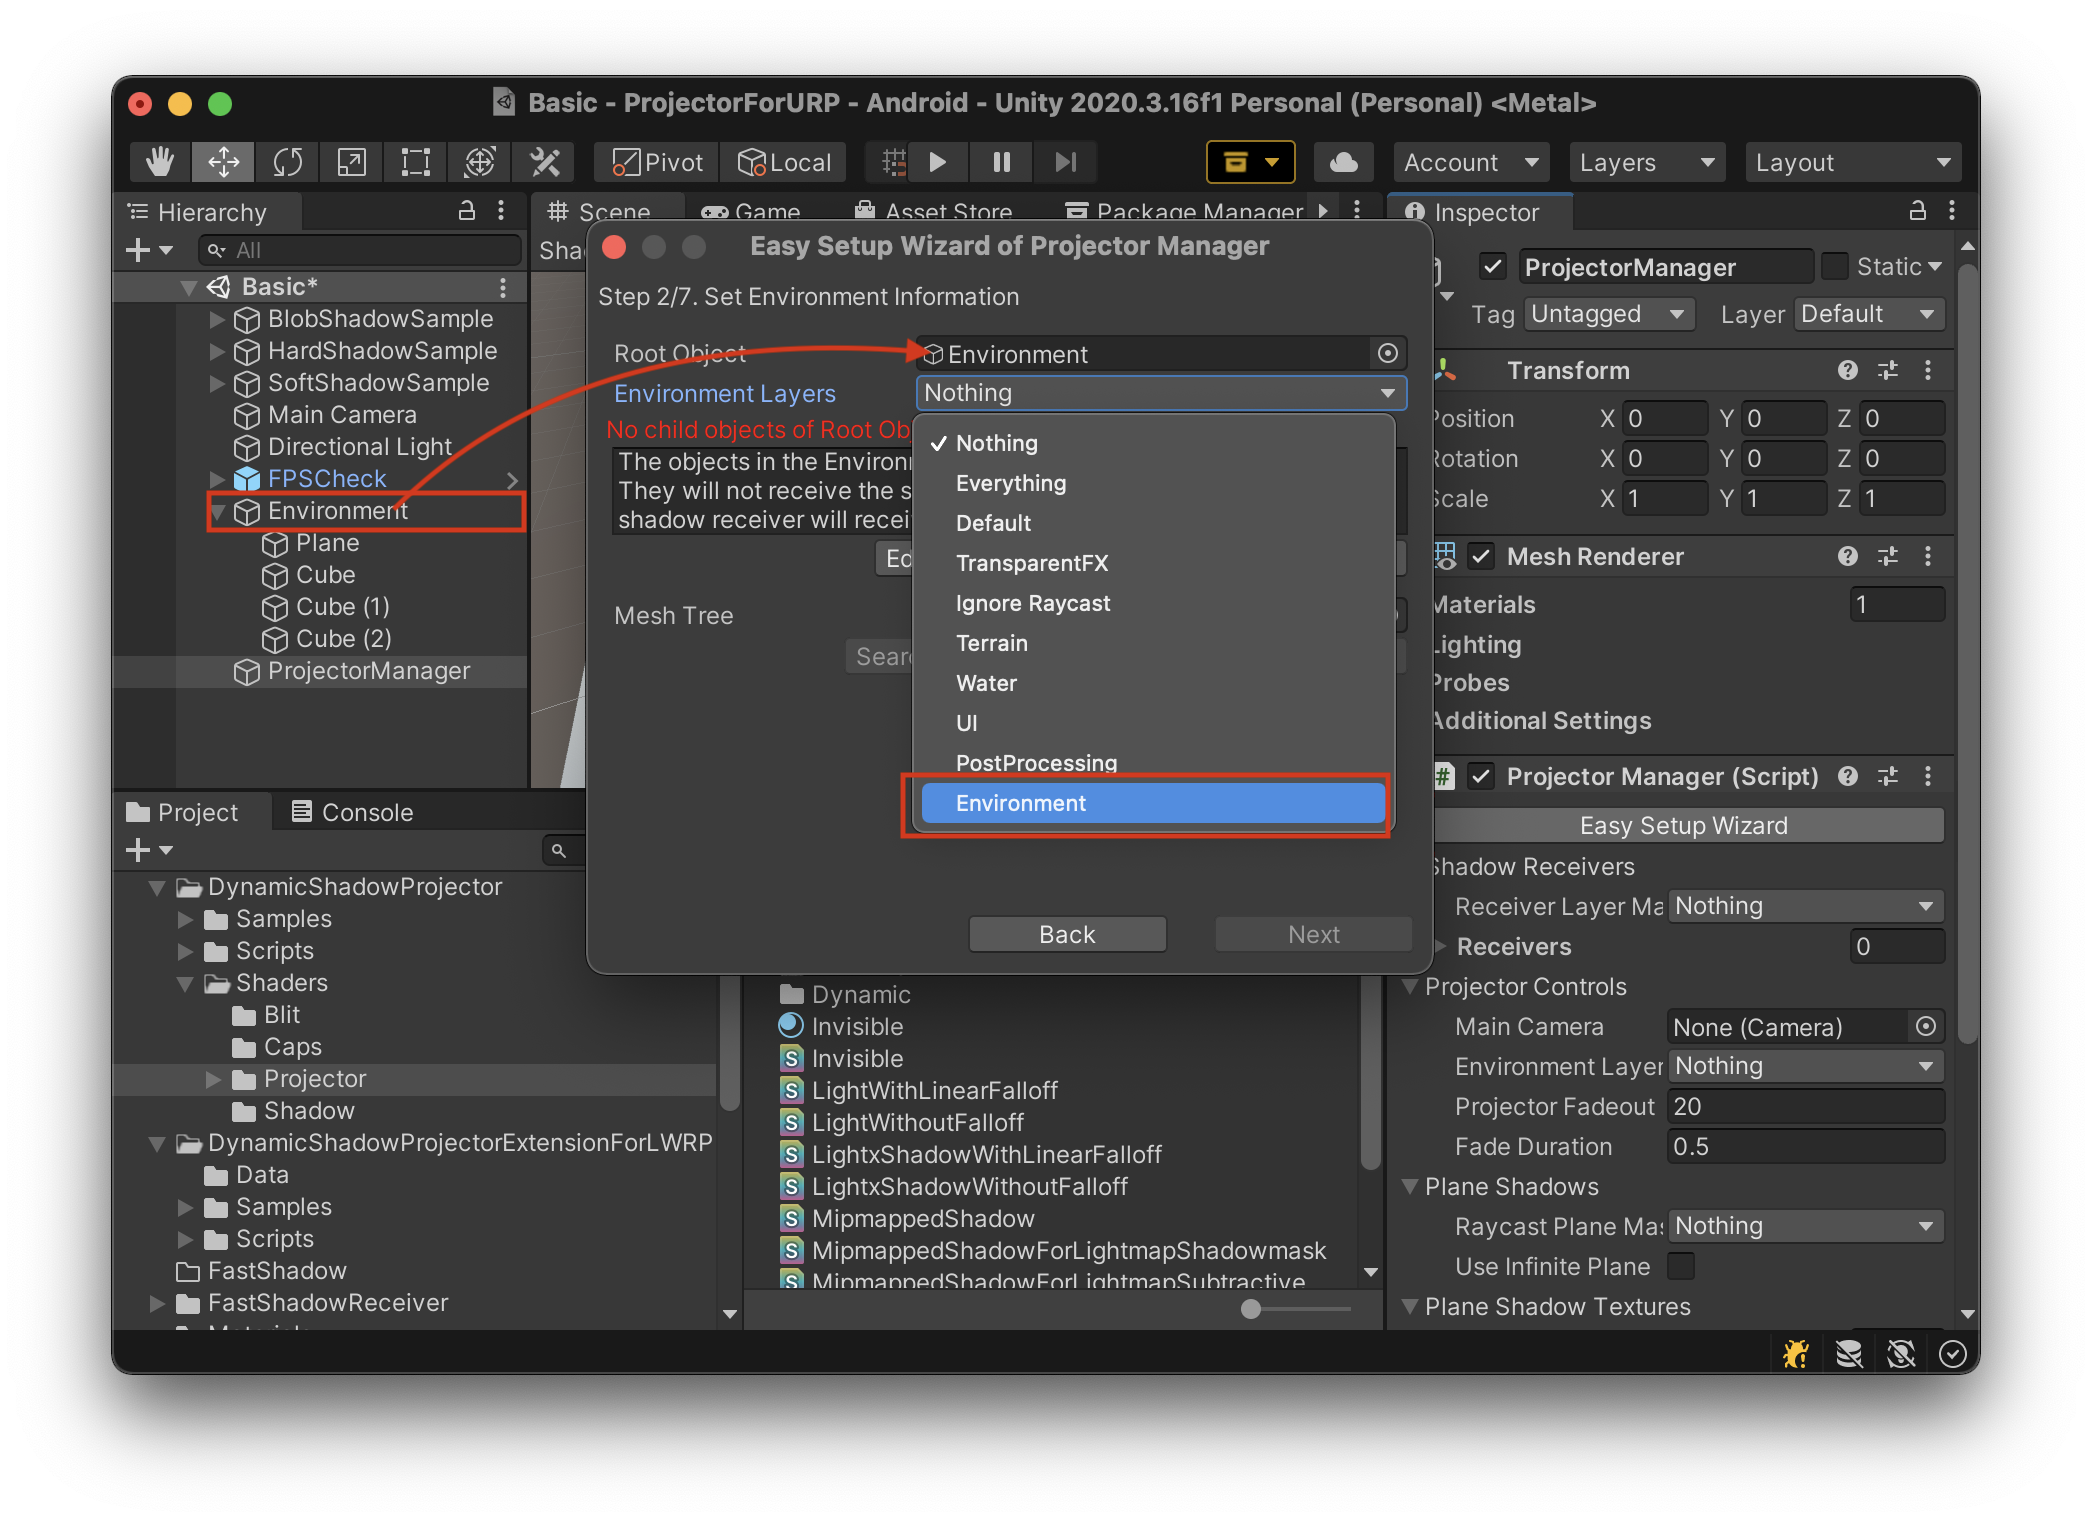
Environment Layers are used for projectors to ignore the Environment objects. Shadows are projected on shadow receivers instead of the Environment objects.
Press ‘Create a New Mesh Tree’ button.
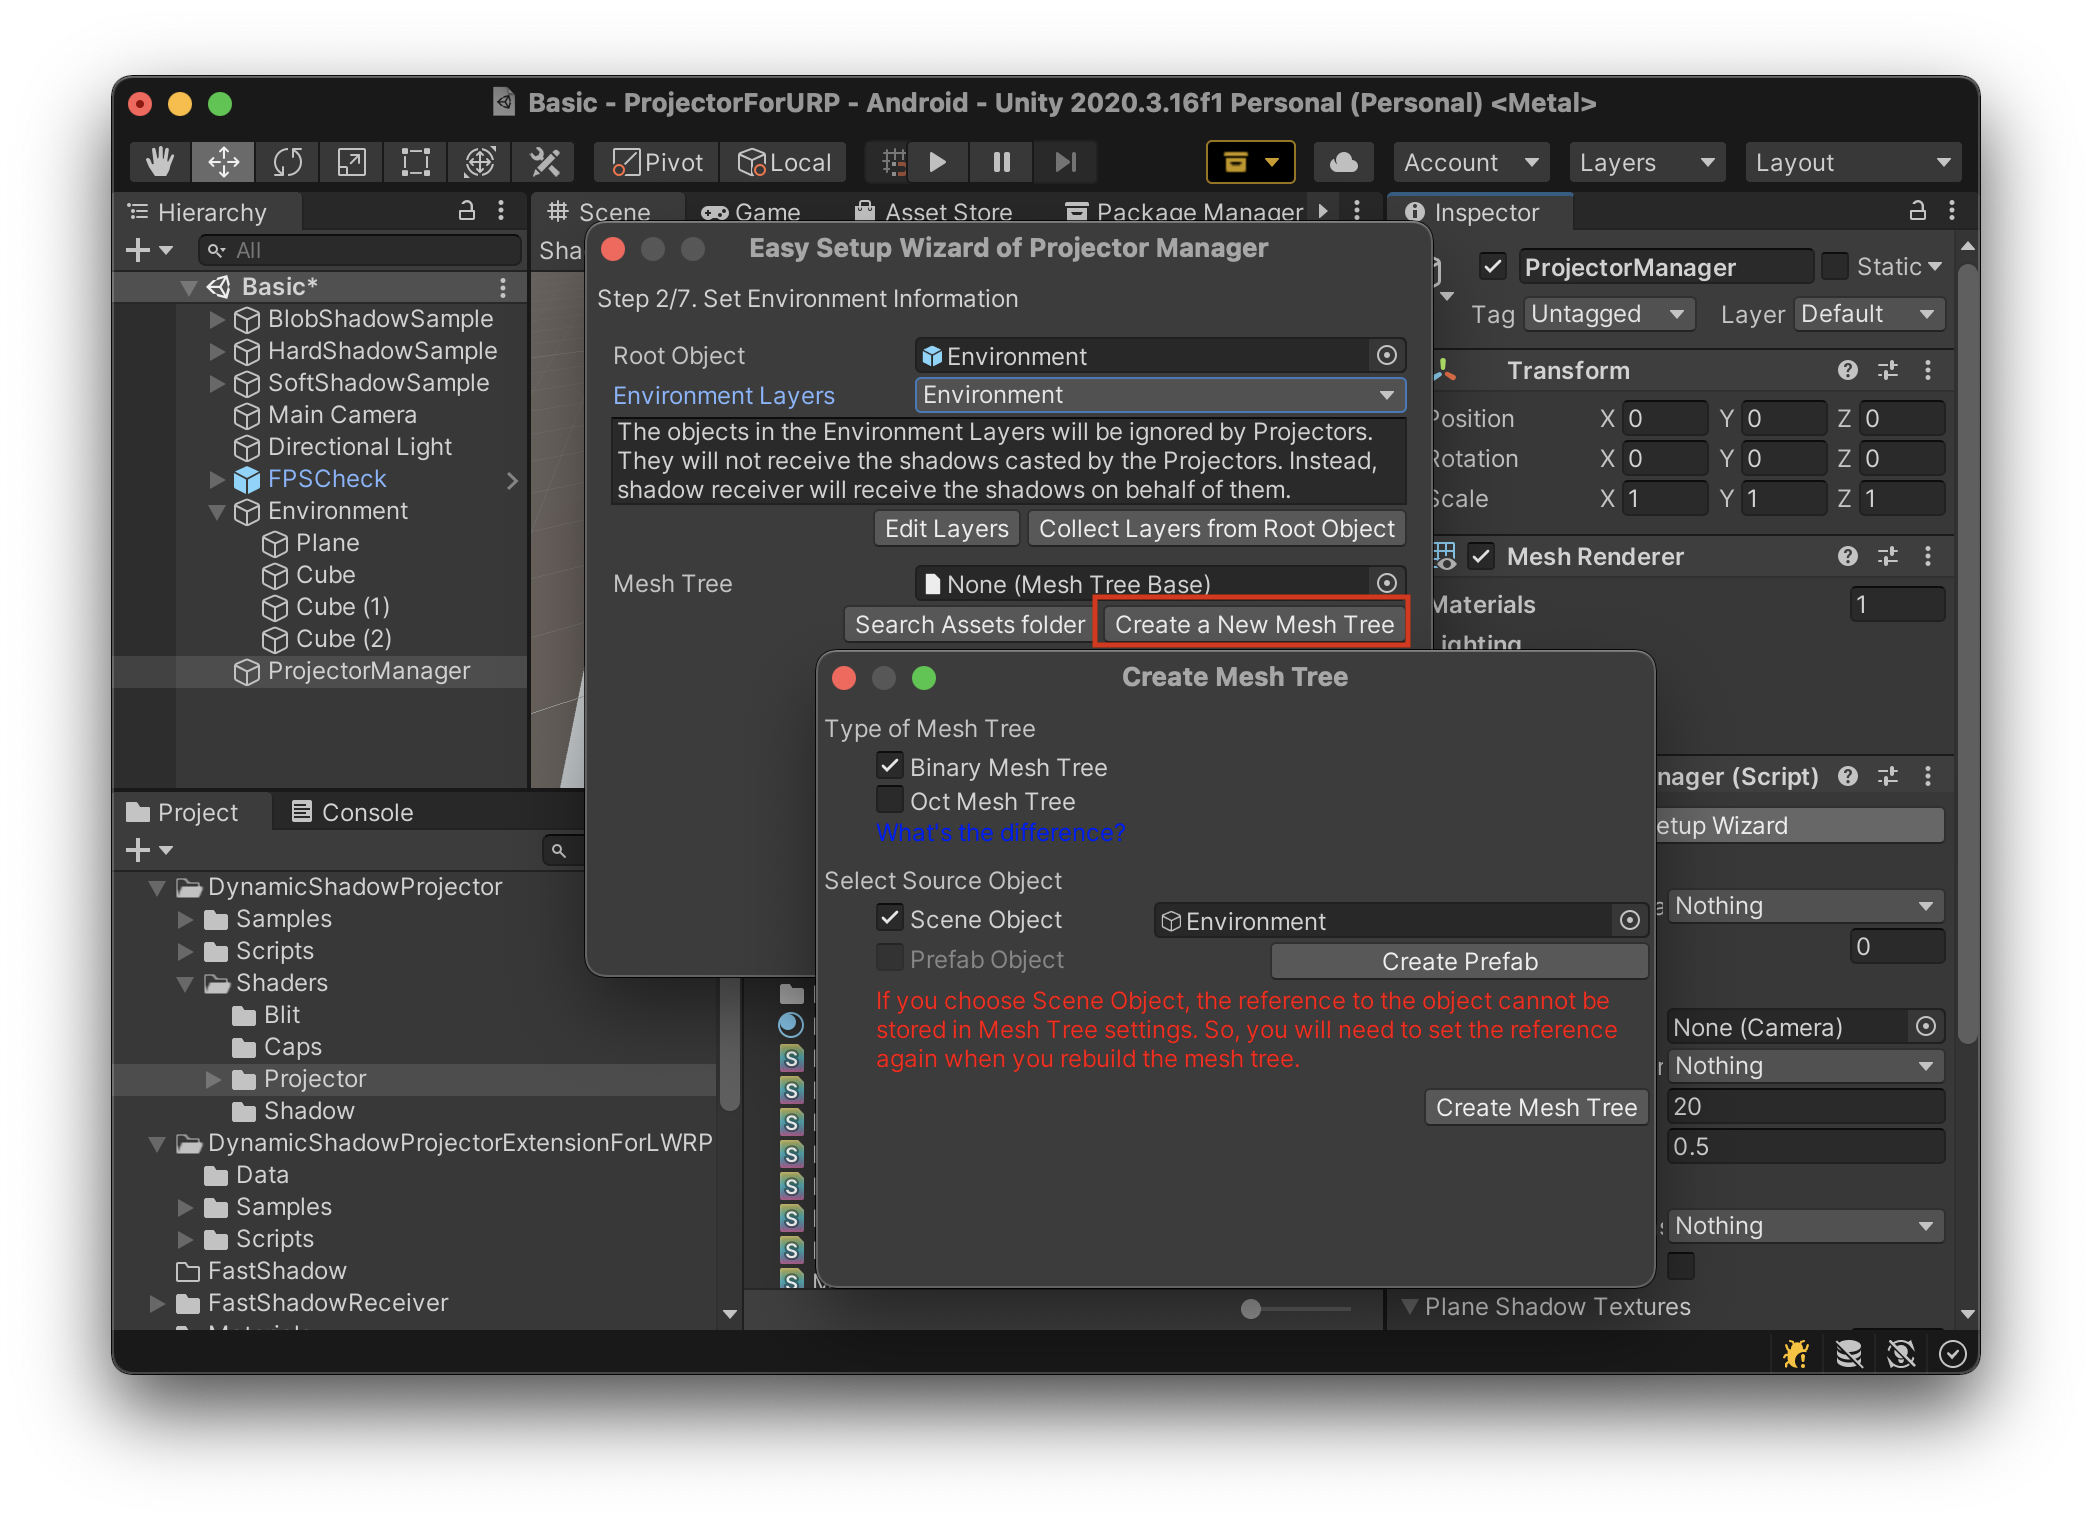
Mesh Tree is an asset data which stores the mesh data of the environment objects in a tree structure so that a shadow receiver can search polygons in the projector frustum.
Mesh Tree needs a reference of the environment objects to collect mesh data. It is possible to use a scene object for the reference, but as a mesh tree is an asset data, it cannot store a reference of a scene object. You will need to set the environment object again when rebuild the mesh tree. I recommend to create a prefab of the environment object.
Click ‘Create Mesh Tree’ button and select a path for the new mesh tree. Then another window will appear.
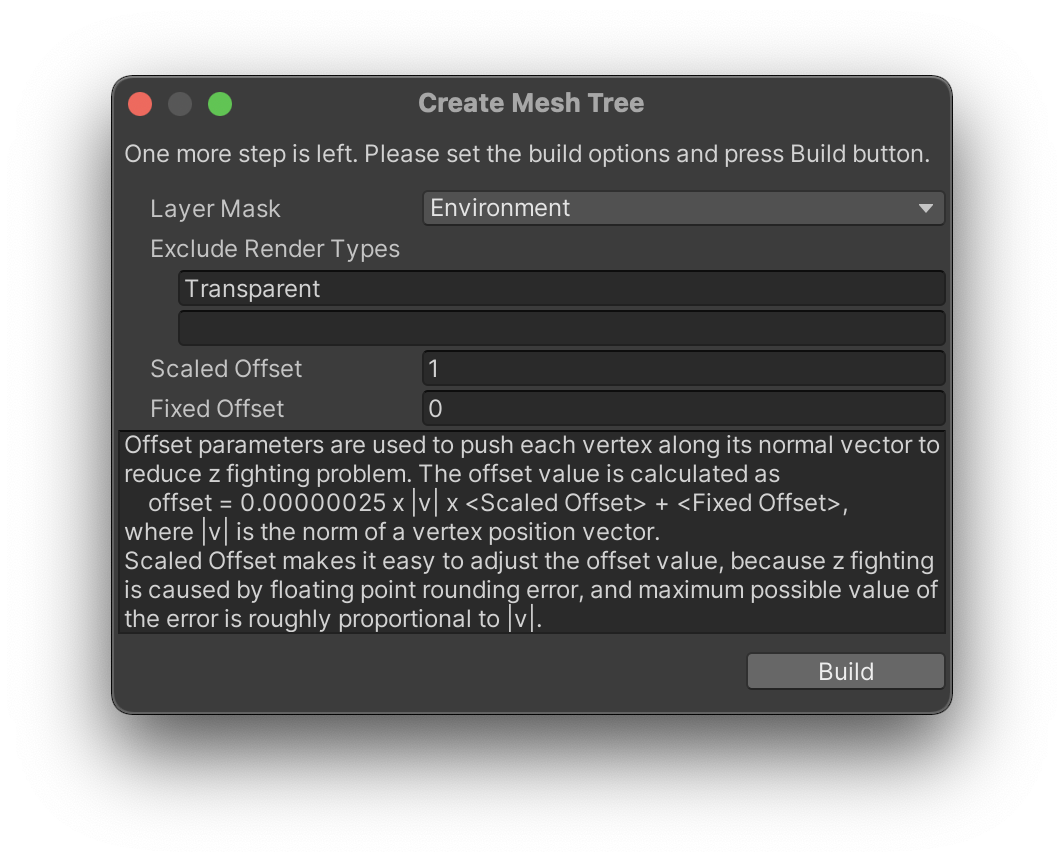
If the environment objects have transparent polygons, those polygons should be removed from the mesh tree. If you want to project shadows on the transparent polygons (see Project shadows on transparent objects), you need to use a different layer for the transparent objects.
Press ‘Build’ button and go back to Easy Setup Wizard. In the next page, select shadow receiver layer mask. This layer mask is used to assign a unique layer for each shadow receiver. You can leave it ‘Nothing’, then all the unnamed layers will be used.

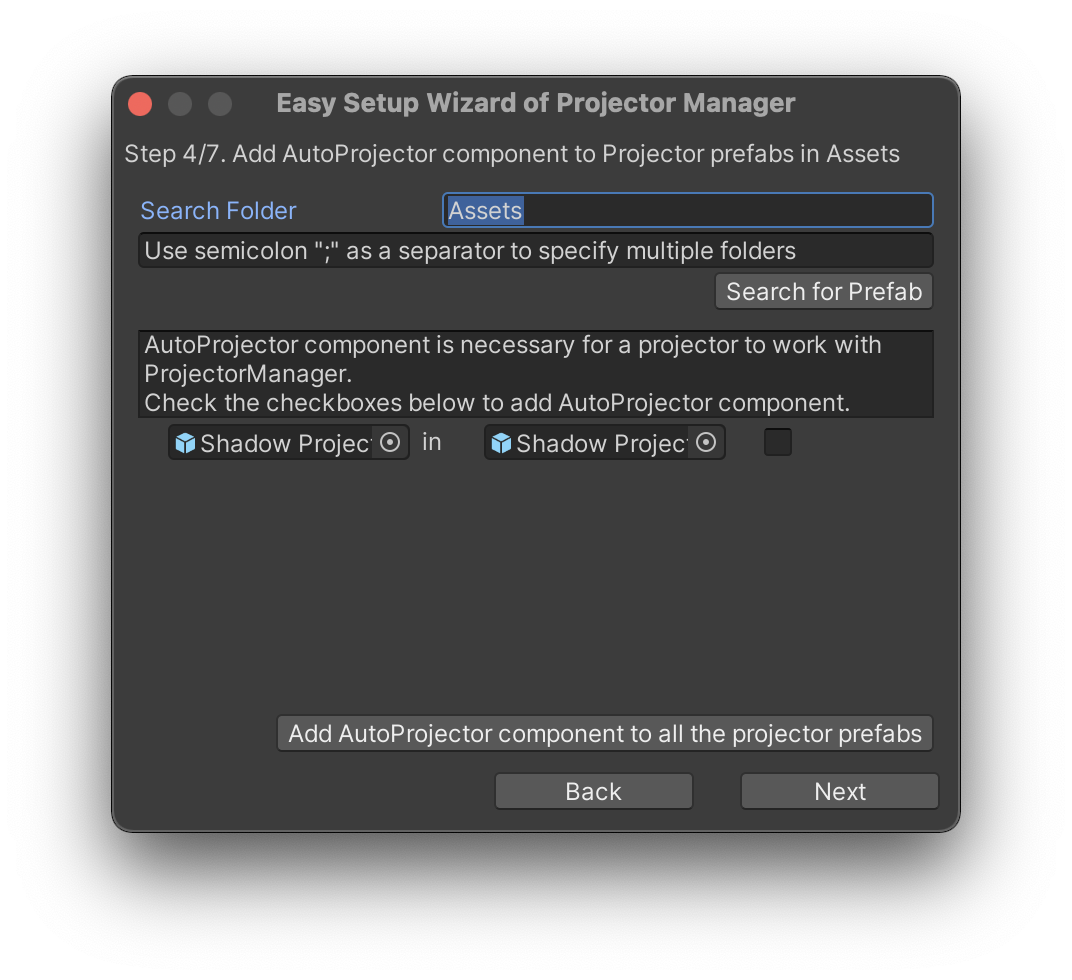
Next, you need to add ‘AutoProjector’ component to every Projector object. Easy Setup Wizard can help you to do that. First, you can add ‘AutoProjector’ component to prefab objects. Select a search path and press ‘Search for Prefab’ button to get a list of prefabs that include projector object. Add check in the right most column to add AutoProjector component to the prefab.
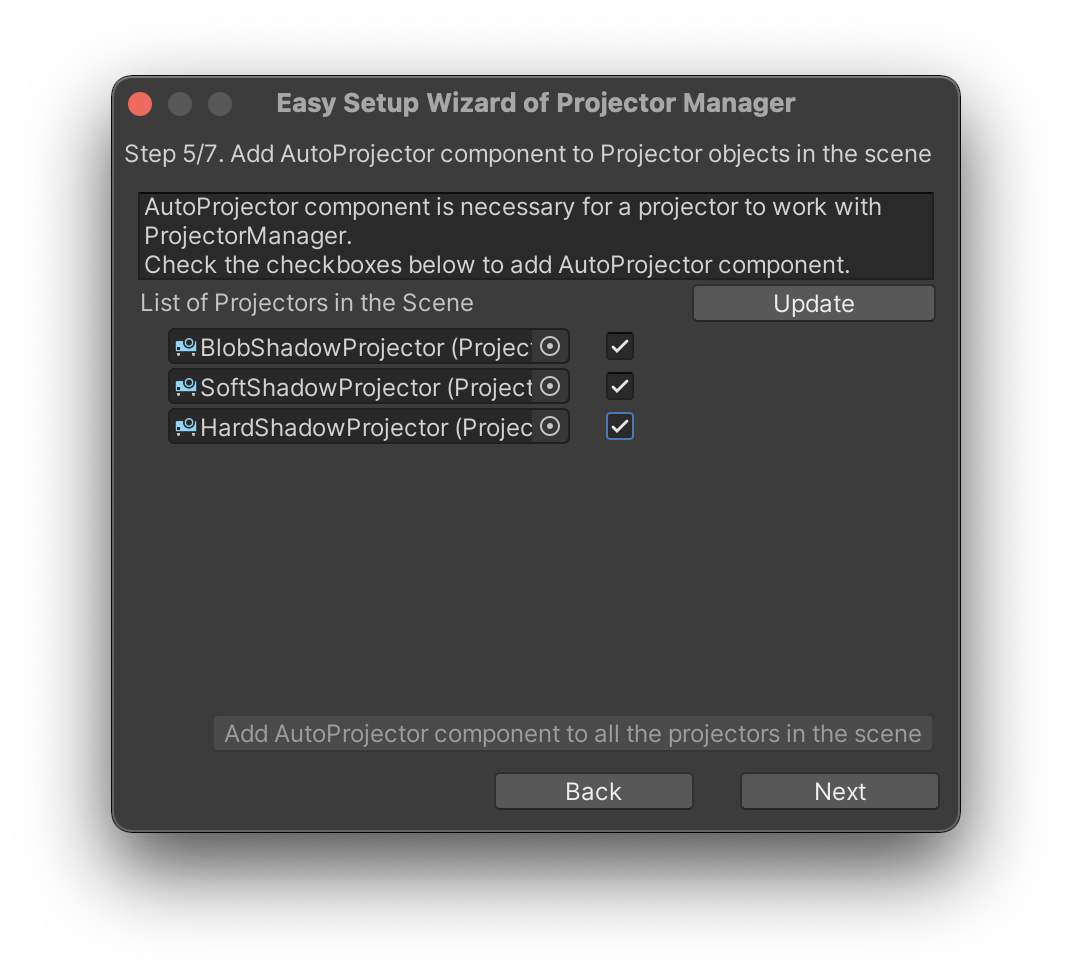
Do the same thing to the scene objects.
We are almost done. In the next page, you can set Fadeout Distance. If you have many dynamic shadow projectors and want to stop generating dynamic shadows far from the main camera, you can use Fadeout Distance. If you don’t need Fadeout Distance, please set a large value.

When using dynamic shadows, you can’t use either Raycast Plane Mask or Infinite Plane.
That’s it. Setup is done.
Result
By using Fast Shadow Receiver, FPS was improved from 52 to 59.